Imagine driving a freshly-waxed car, each ray of sunlight dancing off the surface, catching admiring glances from passersby — an experience many car enthusiasts dream of. But here’s a bold claim: using a buffer for car waxing isn’t just a time-saver; it’s an art form that, when mastered, transforms any vehicle into a polished masterpiece. Intrigued? As someone who spent years engineering Jeeps, I know that waxing is more than cosmetic — it’s a ritual that enhances long-term durability. With my expertise in automotive detailing, I’ll guide you through every step, ensuring each buff and shine is executed with precision. Together, we’ll dive into the details of buffer waxing, from choosing the right tools to perfecting your technique. By the end, you’ll understand why this isn’t merely a maintenance task, but an essential practice for preserving that showroom shine. Let’s embark on this journey toward efficient car waxing, redefining what it means to truly care for your vehicle.
Why Wax Your Car?
What are the Benefits of Waxing?

What if a quick wax could save you thousands in paint repairs down the line? Ever since I started working with cars, I’ve advocated for this simple practice. Waxing isn’t just about enhancing your car’s appearance—it’s about long-term protection and enduring shine. By forming a protective layer, wax shields your car against harmful UV rays, water spots, and contaminants, which can corrode the paint over time. A well-executed wax application can extend your car’s life, saving on costly repairs. I’ve seen firsthand how cars with regular waxing outlast those that skip this essential step. Remember, these simple car care tips can make all the difference in your vehicle’s maintenance and longevity.
When to Wax Your Car?
Are you timing your car waxing sessions properly to maximize results and protect your investment? The timing of your waxing routine can dramatically impact the quality of your car’s finish and longevity. From my experience, rooted in both engineering and automotive detailing, I’ve learned that environmental factors play a crucial role in deciding when to wax. Optimal car care suggests waxing every three to four months; however, tailor this interval to your local climate and seasonal changes. Using professional car care tips ensures not only a brilliant shine but also reinforces your car’s defense against harsh elements, reinforcing why waxing truly matters.
Who Should Use a Buffer?

As I’ve journeyed through the world of car maintenance, I’ve often encountered the question: Is using a buffer really only for professionals, or can everyday car owners benefit too? It’s a query that’s driven by both curiosity and a desire for precision in caring for one’s vehicle. Let me reassure you: understanding who should use a buffer is essential for optimizing your car’s shine and surface health.
For those who are meticulous about their car’s appearance, a buffer isn’t a tool exclusive to professionals. In fact, it’s quite the ally for everyday car enthusiasts like myself who thrive on that extra gleam. Whether you’re an experienced car detailer or a beginner looking to achieve a professional finish at home, a buffer can significantly improve your waxing routine. The key is understanding your personal needs and comfort level. By mastering even basic buffer techniques, the results can transform your car’s look.
Ultimately, anyone with a genuine interest in maintaining their vehicle’s aesthetic integrity should consider integrating a buffer into their care arsenal. Embrace the learning curve—it’s a rewarding journey toward achieving a sleek, polished finish that keeps your car looking its best.
How to Wax a Car with a Buffer
Preparing Your Car for Waxing
Are you making the most common mistakes in car preparation that could ruin your waxing efforts? Over the years, I’ve learned that meticulous preparation is more than just a recommendation—it’s a critical step in the car waxing process. Failing to prep properly can lead to a poor-quality finish and wasted effort. My diligence in car care tips stems from seeing firsthand how overlooked details can impact the final appearance.
Start by thoroughly washing your car to remove dirt and grime, as these can cause scratches when you begin polishing. The importance of using the right soap cannot be overstated. You wouldn’t use dish soap on a car, would you? It’s also vital to check the car’s paint condition. Any oxidation, scratches, or swirls should be addressed with appropriate polishing car paint techniques before you proceed with waxing. I diligently check and touch up imperfections, knowing that these can detract from the overall look if left untreated.
Once the car is clean and polished, your vehicle’s surface is ready to interact optimally with the wax, allowing for enhanced shine and protection. This preparation not only contributes significantly to an efficient waxing process with a buffer but also ensures that all your hard work yields top-notch results.
Choosing the Right Wax and Buffer
What if your choice of wax could make or break the shine on your newly polished car? Having spent years in the automotive space, I know firsthand that selecting the right combination of wax and buffer can significantly impact not just the appearance, but the longevity of your car’s finish. Buffer waxing is a precise art, where waxing techniques must align with the materials used for optimal results.
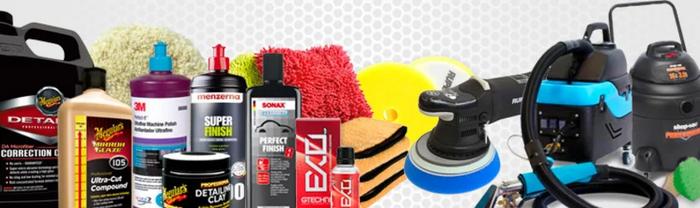
When you’re choosing a wax, pay attention to its base. Carnauba wax provides a deep, glossy shine, ideal for occasional buffer waxing, while synthetic waxes offer more durability, perfect for all-season protection. The buffer choice is equally crucial; low-speed buffers are suited for beginners who prioritize safety, while high-speed rotary buffers, demanding a deft touch, can deliver a stunning polish in skilled hands. Don’t underestimate the role of these selections in refining your waxing technique—these choices craft that impeccable finish we all strive for.
Applying Wax with a Buffer

Do you know the secret techniques that professional detailers use to achieve an impeccable finish? When it comes to applying wax with a buffer, the process is both art and science. I’ve honed these waxing techniques over countless hours of hands-on experience. A buffer not only speeds up the process but can also enhance the shine when used correctly.
First, ensure your buffer pad is clean and designed for machine waxing. The right pad plays a crucial role in evenly distributing the wax, preventing those dreaded swirl marks. I apply a small amount of wax directly to the pad—less is more here. Start with a low-speed setting, applying the wax in overlapping circular motions to ensure comprehensive coverage.
It’s vital to maintain a steady hand, keeping the buffer moving to avoid overheating any section of the paint. Work in small sections; this focused approach not only prevents the wax from drying too quickly but also allows for better attention to detail. After application, let the wax cure slightly before moving on. This step is key to achieving that durable, glossy finish.
With these techniques, you’ll transform your car’s appearance and extend its protection. Perfecting the art of applying wax with a buffer elevates the waxing process, ensuring flawless results consistently.
Wax Removal and Final Touches

Is your final waxing touch leaving streaks instead of that coveted shine? I know from experience that the final wax removal and polishing steps are crucial to achieving a flawless finish. Proper removal of wax is just as critical as the application—something many overlook, resulting in less than stellar results. Once you’ve applied the wax with a buffer, don’t rush through the removal; precision here will define the brilliance of your vehicle’s paint.
Begin with a clean, soft microfiber cloth to gently wipe off excess wax. Polishing car paint requires a light touch and consistent circular motions, ensuring every inch shines uniformly. Pay attention to details, such as door handles and crevices, where wax can accumulate. If you notice streaks, lightly mist a quick detailer spray and polish until the surface gleams. This meticulous attention not only ensures a smooth, streak-free finish but also preserves your car’s paint, making those final touches truly rewarding.
Tips for Efficient Waxing

As someone who has spent years in the fast lane of automotive performance, I understand the quest for efficiency and excellence. Picture this: you’ve got your buffer ready, the perfect wax in hand, but what simple tweaks can you make to your waxing routine to save time and achieve better results? Let me share a few insights from my journey that have transformed my car waxing process.
First and foremost, always clean your car meticulously before waxing. Any dirt or debris left on the surface can lead to scratches once you fire up the buffer. Personally, I’ve found that dedicating a bit more time to a thorough pre-clean ensures a minor miracle when it comes to avoiding paint damage.
Next, invest in high-quality microfiber cloths. Believe me, cutting corners on quality here can lead to streaks and unsightly residue. These cloths are gentle and won’t compromise the quality finish we’ve worked so hard to achieve.
Finally, a consistent circular motion when applying wax is key. From my experience, this method spreads the wax evenly and brings that showroom shine we all desire.
Conclusion
Are you ready to elevate your car care routine and protect your investment with professional-grade waxing? Through my years of experience in automotive detailing, I’ve learned that proper waxing techniques are crucial for maintaining a vehicle’s appearance and value. By mastering the art of using a buffer, you can ensure optimal car protection against the elements, safeguarding your prized possession. From choosing the right products to applying and removing wax with precision, each step is vital. Embrace these techniques to not only have a car that looks great but one that truly stands the test of time.