Imagine this: you’ve just wrapped up a serene camping trip—fresh air, quiet woods, and a sky full of stars. However, as you return home, you notice an unwelcome guest has hitched a ride on your vehicle: sticky, stubborn tree sap. As a former Jeep engineer who once faced this issue firsthand, I can tell you—ignoring dried sap on your car is a quick path to frustrating paint damage. I learned the hard way after a camping trip left my Jeep with unsightly spots that refused to disappear.
Acting quickly is essential to avoid a permanent blemish on your car. In this article, I’ll guide you through effective methods I’ve honed over the years for safely removing sap. Whether you’re a DIY enthusiast or prefer commercial solutions, these tips will help you restore your car’s pristine look. Let’s dive in and tackle that sap before it’s too late.
What is Tree Sap and How Does it Affect Your Car?
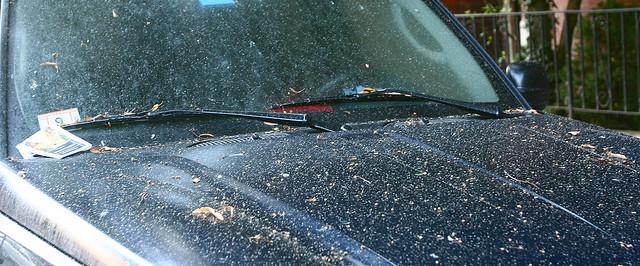
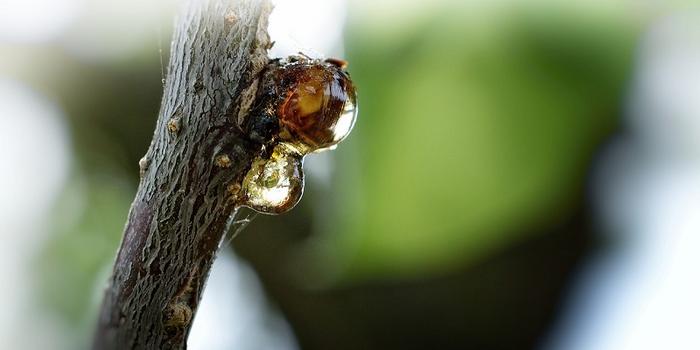
During my time analyzing off-road vehicles, I often encountered sap issues. One particular trip, I parked under a resinous tree, not thinking much of it. Ever wondered why tree sap clings so stubbornly to your car’s surface? It’s because tree sap is a sticky, organic substance that easily adheres to any surface, especially a vehicle’s paint. Over time, it hardens, creating a tough, crusty coating that’s difficult to remove without causing damage.
The sap acts like an adhesive because of its sugar content, which, combined with sunlight and air, leads to oxidation, causing the sap to etch into the paint. The result? A once-pristine surface now marred by what seems to be an inconspicuous drop. On that ill-fated trip, the sap stubbornly resisted my initial attempts to wash it off, tarnishing the paint and leaving a reminder of how tree sap can compromise not only the aesthetic but also the value of your vehicle. Understanding this natural adhesive’s tenacity can really aid in preventive actions, preserving both the look and longevity of your car. The damage left behind serves as a testament to the importance of addressing sap promptly and effectively.
Why Should You Remove Dried Sap?
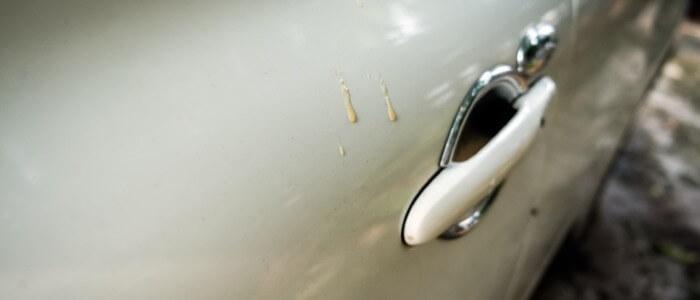
What if I told you that a tiny drop of sap can lead to big repair costs? It’s true—those small, sticky spots on your car can become a serious problem if not addressed quickly. Through years of hands-on vehicle maintenance, I’ve learned just how crucial it is to take care of such issues sooner rather than later. I once made the mistake of ignoring sap buildup on my car, thinking it was a minor nuisance. Several months down the road, I found myself facing the unpleasant surprise of expensive paint repair.
The reality is sap can be incredibly harsh on your car’s paint. Leave it too long, and it hardens, eating into the clear coat and the paint beneath. This not only dulls the look of your car but also exposes the underlying metal to potential rusting. The integrity of your car’s finish is as important as its mechanical health. Don’t learn the hard way, as I did—remove sap promptly to maintain the beauty and resale value of your car.
Who Can Help with Removing Dried Sap?
Should you tackle sap removal yourself or call in the professionals? This is the question I’ve contemplated numerous times when advising fellow car enthusiasts.
From my experience, it’s a question of balancing value, time, and skill. Dried sap, when left untreated, can wreak havoc on your car’s appearance, challenging even the most dedicated DIYer. Often, I advise seeking professional help, especially when you deeply value your car. I’ve had moments where a detailer was my best bet—particularly one who shared techniques I never considered, making the removal process surprisingly easier and more efficient.
There’s no denying that professionals are encompassing in skill and can prevent mistakes that our DIY attempts might sometimes overlook. Their expertise can be invaluable, especially if time is tight or if you aim for that perfect finish. Yet, if you have confidence in your methods, tackling it yourself can definitely save money. It’s finding that balance that’s crucial, ensuring your car remains the gleaming pride it’s meant to be.
How to Remove Dried Sap: Step-by-Step Guide
Using Commercial Products
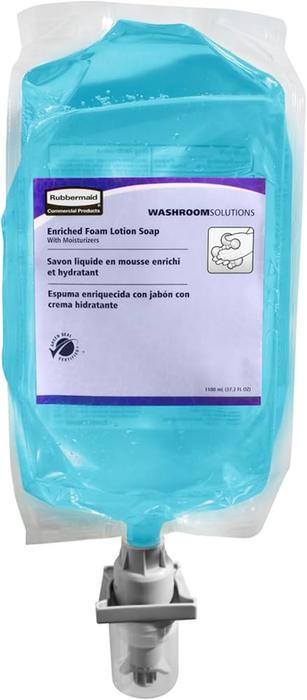
Are commercial sap removal products worth the investment? That’s a question I’ve grappled with numerous times. After many experiments with various methods, I’ve learned that commercial sap removal products have a significant role when you need to safely remove sap from your car. They can be especially beneficial when you’re tight on time or need a dependable solution for showcases or special occasions like car shows. The market is flooded with options, and while not all deliver as promised, the right product can be an absolute lifesaver.
It’s crucial to choose wisely. I remember trying a ‘miracle’ remover that failed spectacularly, leaving me frustrated and sap still on my paintwork. When selecting a product, I recommend looking for those specifically designed for automotive paint to avoid potential damage. Always test on a small, inconspicuous area first, ensuring it won’t harm your car’s finish. Pay close attention to application instructions, as careful execution is as important as the product itself. This diligence will not only maintain your car’s appearance but preserve its value.
In my experience, combining a trusted commercial product with meticulous application provides peace of mind and efficiency. Transitioning from this approach, we can now explore some popular home remedies for sap removal. They offer alternative solutions without the need for specific products, lending a more budget-conscious approach to this perennial car care challenge.
Home Remedies for Sap Removal
What if you could remove stubborn tree sap with common household items? This thought instantly takes me back to a camping adventure where a friend’s car fell victim to nature’s sticky trap. I vividly recall how we concocted a simple solution using vinegar and warm water; it became our go-to savior. Such experiences reinforce one of my favorite truths about automotive care: some of the best tools are already in your pantry.
Exploring home remedies for sap removal is not just practical; it’s empowering. When faced with dried sap, your car’s paint job needs careful handling. Commercial products are abundant, but knowing how to dissolve tree sap automotive using everyday items is invaluable, especially during weekend garage tinkering.
A blend of baking soda and water offers a gentle abrasive to lift sap without scratching. Alternatively, rubbing alcohol works wonders due to its solvent properties. As I found with the vinegar solution, simple elements can balance potent effectiveness with non-abrasiveness, saving paintwork while tackling rigidity.
As you navigate my step-by-step guide, the transition to home remedies illustrates not just an alternative but a revelation in DIY car maintenance. These solutions underscore that often, the simplest means provide the greatest benefits. Keep this handy for when you find yourself knee-deep in sap, looking to regain that flawless car finish.
Techniques to Avoid Scratching Paint
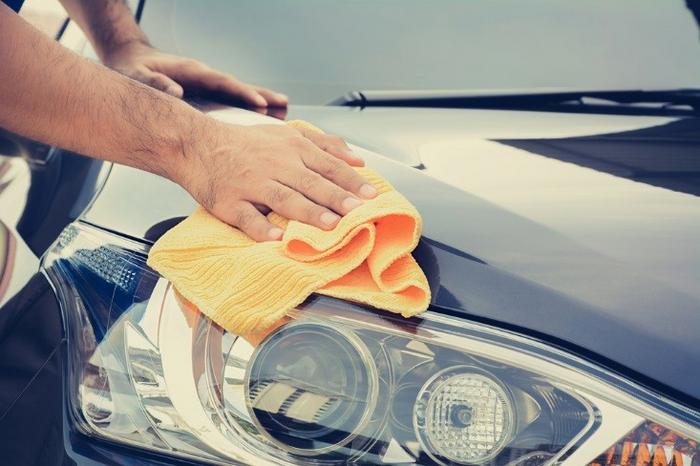
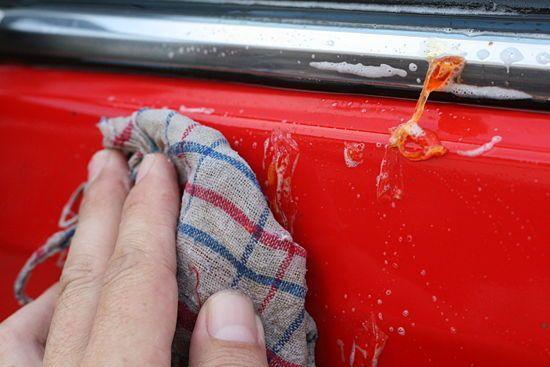
Could the right technique mean the difference between shiny and scratched? I’ve pondered this question countless times, especially when tackling the stubborn nemesis of dried sap. One challenge I faced was learning how to lift sap without leaving a mark, transforming my approach from a mere task to a well-honed craft. My journey with sap removal began in the nuanced understanding of removing sap without scratching paint. This isn’t just about getting the job done; it’s about preserving the gleaming finish of your car.
Through trial and delicate persistence, I’ve developed a soft touch approach, favoring a plastic spatula over abrasive scrub pads. This technique is the cornerstone of the detailed guide for sap removal, emphasizing that sometimes the thorough knowledge of materials can outweigh brute force. Working gently doesn’t mean working ineffectively; rather, it underscores the importance of treating your car’s paint with respect and care.
In the comprehensive process of sap removal, these techniques are pivotal. They ensure the steps taken in how to remove dried sap protect your vehicle’s finish while yielding a spotless result. This meticulous care is more than technique—it’s a reflection of the pride in maintaining your car’s visual appeal and longevity. Moving forward, keep these insights in mind as we explore further strategies and remedies in sap removal.
When is the Best Time to Remove Sap?
When pondering the best time to tackle that stubborn sap on your vehicle, it’s crucial to consider the impact of temperature. Did you know that temperature can significantly impact sap removal effectiveness? This insight became clear to me one cold morning when I struggled in vain trying to wipe off some dried sap. Experience has shown me that tackling this chore on a sunny, warm day, ideally above 70°F, can truly enhance your cleaning success.
Warmer conditions cause the sap to soften, making it much easier to remove without damaging the paint. I’ve found that midday, when the sunlight is most direct, is especially effective. By planning around these natural variables, the process is not only simpler but also more efficient. Understanding these seasonal and temperature influences can dramatically amplify your cleaning efforts, saving both time and frustration. So, next time you spot that sticky nuisance, remember to let the sunshine work to your advantage!
Conclusion
In my journey through the automotive world, I’ve learned that prevention is often easier than the cure. What habits can you adopt today to ensure your vehicle remains sap-free? Regular waxing has been a game-changer, forming a protective barrier on my Jeep and making sap removal much simpler. Consistency in this practice helps prevent the sap from adhering too strongly and saves future headaches. It’s not just a one-time fix; it’s about building good habits to maintain your car’s aesthetics and longevity.
For those stubborn sap spots, techniques outlined in this guide—ranging from commercial products to effective home remedies—can be saviors in your toolkit, ensuring you avoid scratch marks and paint damage. Timing is crucial, and acting swiftly when you notice sap can mitigate long-term effects. Remember, a clean car isn’t just about appearance; it’s about preserving its value and performance. Embrace these strategies, and keeping your car sap-free will become second nature.