It was during a seemingly ordinary restoration project that I first discovered the transformative power of automotive black trim paint. With the trim faded and scratched, I remember the simple yet profound realization that a well-painted trim could dramatically enhance the vehicle’s overall aesthetics and perceived value. This project reignited my passion for car care. Yet, not every paint is made equal. As a mechanic who’s seen a fair share of hit-and-miss outcomes, I know how crucial the right choice of automotive detailing supplies can be. Is there a secret to achieving a flawless finish? Many believe there are, but I’ll share methods I’ve found genuinely effective. From selecting the best paint for plastic trim to mastering application techniques, consider this not just a guide but akin to sharing a trade secret. Now, let’s delve into the essentials that ensure your trim stands the test of time and scrutiny.
Understanding Automotive Black Trim Paint

In my time as a Jeep engineer, I learned through hands-on experience how crucial the right type of paint can be. Whether you’re tackling the trails or simply aiming for a sleek urban look, the durability and flexibility of your trim paint are essential. Did you know that not all black trim paints are created equal? This revelation was pivotal when working on a client’s Jeep, where we chose a flexible trim paint designed to endure the tough, unpredictable conditions of off-roading.
That project taught me a significant lesson: the right paint not only enhances the aesthetic appeal but directly impacts the longevity of your vehicle’s trim. Utilizing the wrong type could mean a finish that looks great initially but quickly starts to fade or crack under pressure. I still remember the satisfaction when our chosen paint not only looked fantastic but also survived the rigors of off-road adventures, proving the wisdom of our choice. This journey underscored the importance of selecting the right product — one that balances visual appeal with uncompromising resilience. In the sections ahead, I’ll share insights on selecting the right products and techniques to ensure your automotive trim looks its best and stands the test of time.
Selecting the Right Products
Top Recommended Products
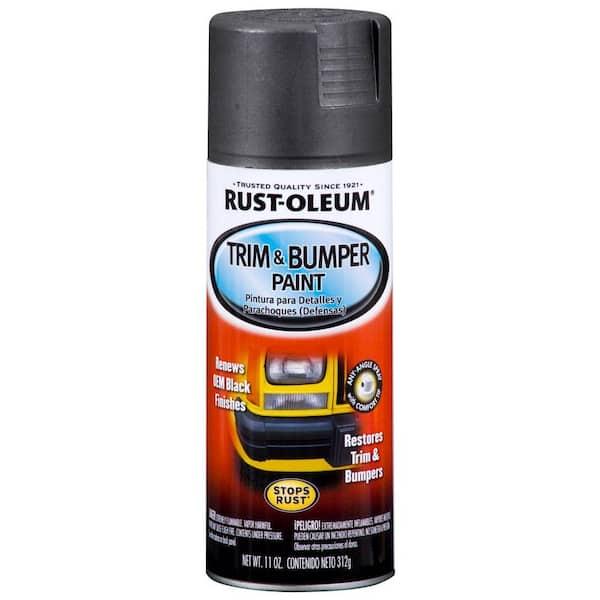
When it comes to painting, which products make a significant difference? Over the years, I’ve explored numerous trim paints, uncovering some real gems. My primary criterion is always finding the best paint for plastic trim. One standout is Rust-Oleum; its application glides on effortlessly and the finish remains like new, even when exposed to relentless UV rays. This feature is crucial because nothing detracts from a vehicle’s appearance more than faded trims. In my experience, a matte black trim paint provides an elegant, timeless look. It’s a recommendation I’ve made countless times, especially to those tackling exterior projects.
Having tested various products, I’ve refined my trim coating techniques, ensuring a pristine result every time. Choose wisely, and your hard work will stand the test of time. As we delve into the next section on identifying key features, these insights will be invaluable for making informed decisions.
Key Features to Look For
What features should you prioritize when choosing trim paint? After years of experience in automotive engineering and countless restoration projects, I’ve learned the hard way that selecting the right exterior plastic paint is crucial. From my Jeep days, a key lesson I picked up is to focus on flexibility and adhesion. Imagine driving your 4×4 off-road, with the trim fiercely enduring every hop and bump. A paint boasting high flexibility will withstand this physical strain without cracking, ensuring longevity.
Moreover, a quality paint for bumpers should have exceptional adhesion. Weather conditions are unpredictable, and with the trim being constantly exposed, you need a product that can securely cling to it. Once, I made the mistake of picking a paint that was touted as durable but lacked elasticity—it resulted in disappointing cracks. Now, I delve meticulously into product specs, prioritizing ones that promise both flexibility and firm adhesion. This knowledge not only saves time but also enhances the finished look of every project I tackle.
DIY Trim Painting Techniques
Preparation and Planning
Reflecting on my previous projects, I can’t stress enough the importance of thorough prep work. How critical is preparation before diving into painting? It’s everything. Years ago, I neglected to clean a surface properly, and the result was a finish that flaked off embarrassingly fast. That experience taught me that proper preparation and planning are the backbone of successful DIY trim painting techniques when using automotive trim paint. Whether you’re going for a sleek matte black trim finish or restoring old paintwork, preparation is key. Make sure to clean, sand, and degrease the trim before reaching for a brush or spray can.
This preparation prevents adhesion issues and guarantees longevity, transforming your project into a showstopper. Properly prepped trim ensures that your application process is smooth and that the end result is durable and aesthetically pleasing. By embracing these meticulous prep steps, you’ll be setting yourself up for painting success, where every stroke counts and the finish lasts the distance. My hands-on approach to this craft has proven invaluable in achieving that professional-grade finish with your automotive black trim.
Step-by-Step Application Process

In my years of teaching painting techniques, one thing has always stood out: success is rooted in a systematic approach. What are the stages that ensure success in painting black trim? The importance of this step-by-step process cannot be overstated. Each phase from trim coating techniques to the final application is crucial not just for aesthetics but for long-lasting durability.
It starts with preparation—meticulously cleaning and masking the areas to ensure nothing other than the black trim spray paint gets adorned. Then comes my favorite part, spraying. I remember my first experience when I hastily applied thick coats. That taught me the value of layering thin, even strokes. Patience and precision form the core of perfect spraying technique, ensuring a splotch-free finish. Allowing each coat to dry adequately before applying the next is essential; it builds a smooth, professional-grade surface that stands the test of time.
This methodical sequence not only enhances the effectiveness of the paint but also preserves the integrity of the trim. By adhering to this structured approach, anyone can transform their vehicle’s appearance, aligning their efforts with a mechanic’s standard of a flawless finish. Remember each step and you’ll make sure your trim painting does justice to the precise DIY techniques we’ve explored.
Common Mistakes to Avoid

What pitfalls should you dodge on your painting journey? Drawing from my own experiences in the garage, the smallest oversight can be the most costly. When it comes to DIY trim painting, preparation is non-negotiable—half the battle begins before the brush even touches the surface.
One critical mistake I’ve learned to avoid is skipping the primer. Years ago, I went straight for the paint, disregarding the need for a base when working on black trim. The paint faded unevenly within months, urgently calling for a redo. My advice? Always use a dedicated primer suitable for plastics, ensuring the longevity of your work.
Moreover, using quality automotive detailing supplies cannot be overstated. Cheap alternatives might seem tempting, but they often lack the durability needed for restoring black trim. Investing in superior products initially saves time and money in the long run, maintaining that pristine finish you’ve worked hard to achieve. By understanding these common pitfalls, your DIY project will deliver professional-grade results that stand the test of time.
FAQs
What is the best type of black trim paint for cars?
How do you prepare the surface before applying trim paint?
Can I use regular spray paint for black trim paint?
What are some tips for applying black trim paint neatly?
How long should I wait before washing my car after painting the trim?
Conclusion
Are you ready to give your vehicle a new lease on life with black trim paint? From personal experience, the satisfaction of stepping back to admire my freshly painted trim is unmatched. Transforming faded plastic into a bold black rejuvenates not just the vehicle’s look, but also your pride in ownership. Embrace DIY trim painting projects—each opportunity is a lesson that enriches your mechanical knowledge and passion. Choose the best paint for plastic trim, follow specific steps, and avoid common errors for a flawless finish. Trust me, the final results are worth every effort. Let’s get painting!