As a former engineer who frequently dealt with paint finishes in the auto industry, I’ve seen firsthand how overspray can ruin even the most meticulously cared-for surfaces. I remember early in my career receiving a freshly painted Jeep. The paint job was impressive, but the overspray on the windows was equally astounding, presenting a daunting challenge. This incident sparked my journey into understanding the intricacies of overspray removal, teaching me that the right preparation and tools are crucial.
In this article, I’ll share the techniques and tips I’ve learned from years of experience in dealing with the pesky trouble of paint overspray. From recommending the best cleaning products and tools to using methods like the clay bar technique, I’ll guide you through the process of effectively tackling overspray. Whether you’re dealing with glass, rubber trim, or other surfaces, you’ll find solutions that can transform your approach and restore your projects to perfection.
Understanding Overspray
What is Paint Overspray?
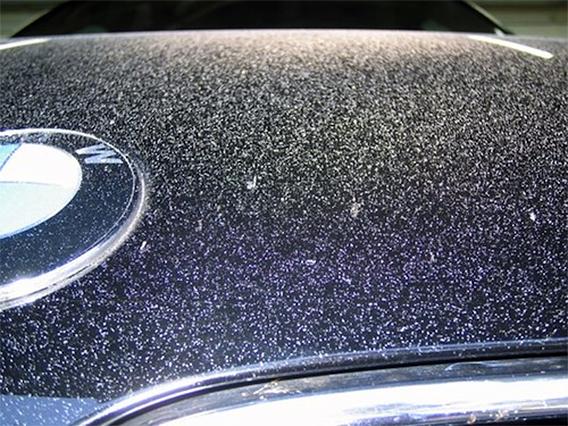
Have you ever wondered what happens when paint goes where it shouldn’t? In my experience as a Jeep engineer, I found that paint overspray is often the culprit of unexpected disruptions in the painting process. Overspray occurs when paint particles land on unintended surfaces, leading to unwanted coverage. This can transform a once-spotless vehicle into a frustrating canvas of misplaced color. I once encountered this firsthand when an inexperienced technician inadvertently decorated a pristine white vehicle with a dose of bright red. It’s a vivid reminder of how critical it is to control the spraying environment and follow meticulous painting techniques.
Understanding paint overspray goes beyond recognizing it as an annoying mishap. It requires awareness of how and why particles stray. Grasping this can significantly ease paint overspray removal. By addressing overspray’s nature, we lay the groundwork for effective removal techniques and demonstrate how crucial it is to maintain control during paint application. This knowledge bridges the gap between oversight and precision in avoiding future mishaps.
Common Causes of Overspray

Understanding overspray begins with identifying its common causes. This knowledge is vital for anyone in the paint industry, especially when tackling overspray disasters. So, what are the most common mistakes that lead to overspray disasters? Reflecting on my experiences, I often find that improper spray gun positioning is a frequent culprit. I recall a specific incident where a misaligned gun led to a significant issue on the shop floor. The technician had overlooked basic car painting tips and created an unnecessary mess, underscoring the importance of mastering technique.
Other typical causes include insufficient masking, incorrect air pressure settings, and using the wrong nozzle size. These often result from a lack of oversight and inadequate preparation, impacting both the quality of the finish and the amount of time spent on cleanup. Emphasizing overspray prevention methods early on is crucial. By focusing on proper planning, such as ensuring that all surrounding areas are well-covered and the equipment is correctly set up, we can significantly reduce the risk of overspray and its subsequent headaches. This proactive approach not only saves time but also enhances the workflow in any painting operation, paving the way for more efficient and successful outcomes.
Tools and Materials for Overspray Removal
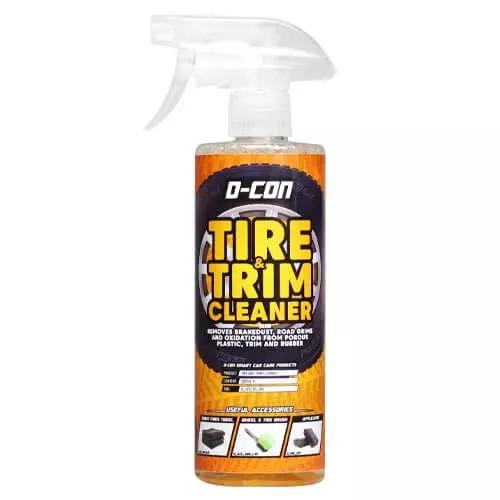
Recommended Cleaning Products
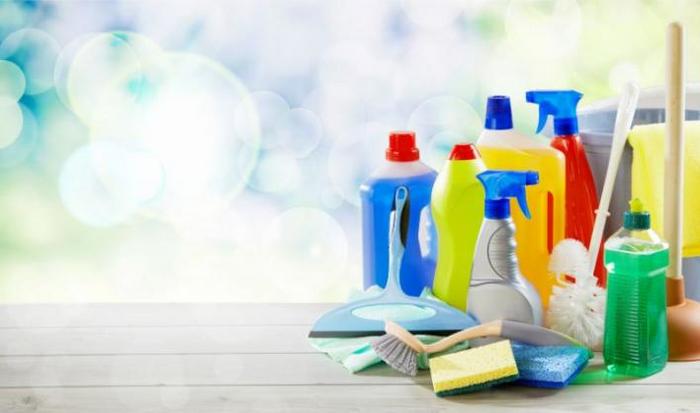
Did you know that the right cleaning product can make all the difference in removing paint overspray? From my experience, using the correct products is as essential as selecting the right tools. Overspray removal often feels like an art and a science, and I’ve found that specialized cleaning products for overspray can simplify the process significantly.
For instance, when I was tasked with restoring a classic Jeep, the quality of the cleaning products I chose determined how quickly and effectively I could clear the residue. After trying various solutions, I discovered that a combination of specialized solvents not only made the task less tedious but also preserved the underlying surfaces. It’s a constant reminder that not all products are created equal; experimenting can lead to surprising, time-saving results.
By understanding how various cleaning agents interact with different materials, you equip yourself with one of the most powerful allies in overspray removal. As we explore further, let’s delve into the best techniques and tools that complement these products perfectly.
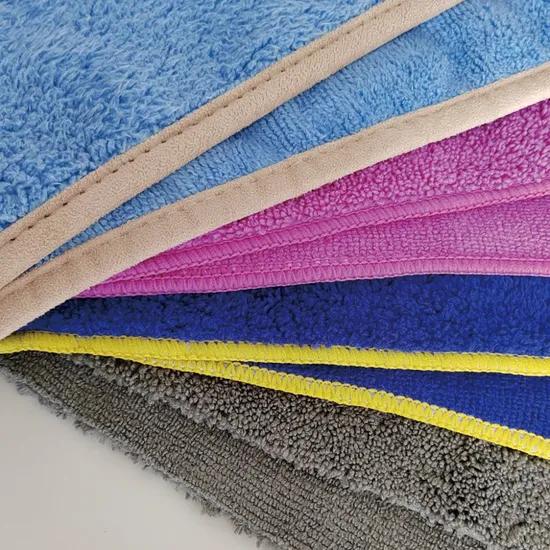
Tools for Effective Removal
What tools do you really need to tackle paint overspray like a professional? This is a question I’ve pondered countless times over the years, refining my methods with every project. One standout tool in my arsenal is the plastic razor blade. I’ve often used it to delicately remove overspray from painted surfaces without causing scratches— a lesson learned through painstaking trial and error on a cherished restoration project.
Another indispensable tool in my kit is the Scotch Brite pad. Its dual-purpose functionality allows for gentle yet effective cleaning, making it ideal for those tougher spots that demand a bit more finesse. These tools form the backbone of a successful overspray removal strategy, offering both precision and care.
Combining these tools with the right technique ensures not only the removal of stubborn paint deposits but also the preservation of the surface integrity. As we delve into specific removal techniques next, you’ll see how these tools can be deftly paired with methods that elevate their effectiveness, solidifying your grasp on executing a professional-level restoration.
Techniques to Remove Overspray
Using the Clay Bar Method
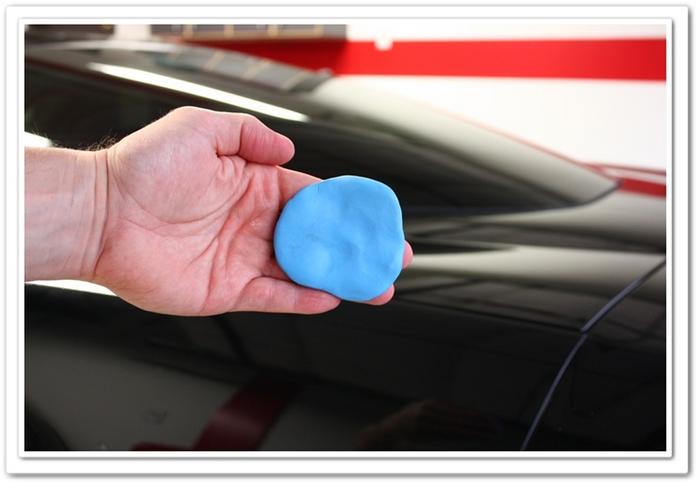
Have you ever heard of the clay bar method and wondered how it can transform your paint job? This technique stands out as a meticulous yet impactful approach in removing paint overspray. The first time I used a clay bar was during a detailing project on my own Jeep. I was amazed by how well it picked up not just overspray but also other contaminants that regular washing failed to remove. The clay bar method became a favorite of mine, offering a surprisingly easy workaround for overspray challenges that leave your paintwork looking immaculate.
The process is fairly straightforward. First, ensure the surface is clean and well-lubricated with a clay lubricant to prevent scratching. Then, gently glide the clay bar over the affected area, allowing it to grab onto the overspray. You’ll feel the surface becoming smoother as the clay bar effectively removes the unwanted paint particles. With each pass, the clay bar demonstrates its strength in restoring a flawless finish to the vehicle’s paintwork.
The significance of the clay bar method in the realm of overspray removal cannot be overstated. It not only allows for precision in targeting overspray but also enhances your vehicle’s overall aesthetic by clearing accumulated grime. This method complements other techniques, offering a complete solution for maintaining your cherished automobile’s appearance.
Chemical Solutions
What happens when your trusty cleaning methods fail? Sometimes, only chemicals will do the trick. I’ve been there—staring at a stubborn layer of overspray on an old truck’s finish, feeling like nothing would make it budge. That’s when I turned to a solution experts often recommend: lacquer thinner.
Using lacquer thinner requires precision and care. First, I ensure I’m working in a well-ventilated environment, armed with gloves and protective eyewear. Applying a small amount on a soft cloth, I gently rub it over the affected area. It amazes me how quickly the thinner breaks down the unwanted paint without harming the underlying surface if used judiciously. My experience taught me that knowing when to escalate to stronger solutions is crucial, especially when dealing with stubborn overspray.
Embracing chemical solutions is necessary but demands respect for safety measures and correct application techniques. This approach is especially effective for metal surfaces, transitioning smoothly into methods like using a clay bar for more delicate treatments.
Non-Abrasive Techniques
Could non-abrasive methods be the key to preserving your car’s finish while tackling overspray? Drawing from my experiences, particularly when I encountered a beautifully painted car in one of my workshops, these techniques have proven indispensable. The vehicle’s delicate surface demanded an approach that wouldn’t compromise its pristine finish. My go-to solution involved non-abrasive cleaning techniques like using specialized pads, ensuring that while the overspray was removed, the paint remained untouched.
When you’re faced with an overspray situation, the best practice is to carefully assess the condition of the surface. In some cases, as I’ve personally observed, the gentlest touch indeed results in the most effective, long-term protection of the vehicle’s appearance. By opting for non-abrasive methods, you prioritize your car’s health while efficiently addressing overspray issues.
Following these carefully chosen techniques links seamlessly to understanding how chemical solutions can further assist in removing stubborn residues. Remember, the path to a flawless finish begins with the right choice of approach.
Addressing Overspray on Different Surfaces
Removing Overspray from Glass
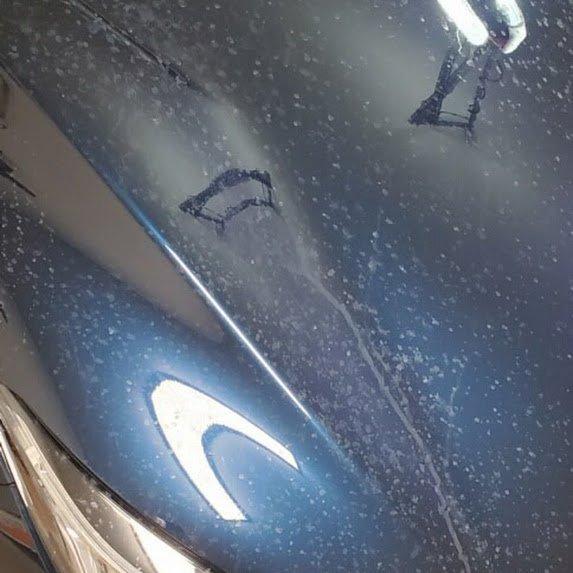
Is glass truly impervious to paint overspray, or does it require special attention? I can tell you from personal experience that glass surfaces are not immune to the trials of paint overspray. When my father’s Jeep received a fresh paint job, I watched as some paint found its way onto the windows. Attempting a simple polish proved fruitless, teaching me that removing overspray from glass requires a different approach.
Glass demands specific techniques and tools for effective overspray removal. Over time, I learned to avoid harsh abrasives that could damage the surface. Instead, I utilized specific glass cleaners and a plastic razor blade to delicately lift the overspray. These tools gently attacked the paint without scratching the glass — a method honed through real-life trial and error. By focusing on these specialized strategies, you can return your windows to their pristine condition, ensuring clarity and cleanliness.
Cleaning Overspray from Rubber Trim
When tackling overspray on different surfaces, it’s crucial to consider the material you’re working with. What’s the secret to preserving rubber trim while tackling tough overspray?? Through my extensive experience with classic automobiles, I’ve learned that rubber trim requires a delicate touch—missteps can be costly. I still recall the moment I realized I had ruined a beautiful piece by using a method that was too harsh. That day taught me a vital lesson: to clean overspray on rubber trim effectively, one must opt for gentler solutions.
Start by using a mild cleaning agent; there are plenty available that are safe for both paint and rubber. Gently work the product into the area with a soft cloth, being careful not to use too much pressure. Some may find a clay bar can also be a useful tool in this endeavor if used with caution. This approach maintains the integrity of the rubber trim and avoids the costly mistake of having to replace it entirely. As you become adept at the process, these techniques will safeguard your vehicle and reputation, expanding your confidence in addressing overspray on various surfaces. Maintaining this care and attention ensures that the pristine charm of those classic vehicles remains unblemished.
Preventing Future Overspray Issues
In my early days, I often found myself frustrated, scrapping vehicles due to the dual challenges of poor painting techniques and a severe lack of foresight. It was an expensive lesson, one that taught me the hard way about the importance of preventive measures. This experience forever changed my approach: always prioritize preparation over repair.
What proactive strategies can save you from the headache of overspray in the first place? It all boils down to thorough prep work. The more effort you invest before applying the first coat of paint, the less you’ll have to toil away later, scrubbing and sanding away overspray damage. Remember, prevention isn’t just a strategy; it’s a commitment to excellence.
Always ensure your painting area is adequately shielded. Use drop cloths, plastic sheeting, and masking tapes generously. Take the time to cover all nearby surfaces that you don’t want painted. This isn’t overkill; it’s wisdom gathered from many costly mistakes. I’ve seen firsthand how just an extra ten minutes of preparation can safeguard hours of frustrating cleanup.
Lastly, consider environmental factors. Wind can carry paint droplets far beyond your intended target. Prioritize indoor painting or choose a day when inclement weather won’t disrupt your process. Reviewing such details before starting will spare you from remedial headaches.
FAQs
What are the best surfaces to start with when removing paint overspray?
Which tools and materials are essential for removing paint overspray?
How can clay bars be used effectively to remove paint overspray?
Are there specific chemical solvents recommended for paint overspray removal?
What protective measures should be considered during paint overspray removal?
Conclusion
Can mastering paint overspray removal elevate your automotive care skills? Reflecting on my experiences, I believe that mastering these techniques doesn’t just make you a better car owner; it boosts your problem-solving skills and instills confidence in handling vehicle maintenance tasks. From understanding the ins and outs of what paint overspray is and identifying its common causes, to learning about essential tools and materials, this journey into vehicle care opens up avenues for effective car maintenance.
With the right techniques, such as the Clay Bar Method, chemical solutions, and non-abrasive techniques, you can tackle overspray issues efficiently. Each method offers unique benefits and challenges, and knowing when and how to apply them ensures the best results for your vehicle, whether dealing with glass, rubber trim, or any other surface. And let’s not forget, preventing future overspray problems is equally crucial, securing your car’s pristine condition. Overcoming overspray has taught me more than just cleaning; it’s about appreciating the nuances of automotive care.