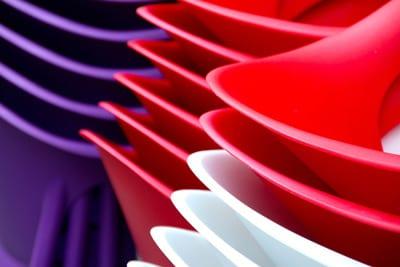
Ever looked at your car’s plastic parts and thought, “What if these faded panels could showcase my true style?” As a former Jeep engineer, I’ve witnessed countless transformations with a fresh coat of paint. It’s not simply an aesthetic upgrade—it breathes life into a vehicle’s identity. But painting plastic isn’t a casual DIY job; it’s a craft requiring precision and the right approach.
In this comprehensive guide, I’ll share everything you need to know to paint your car’s plastic parts successfully. We’ll delve into understanding the properties of plastic parts and why proper preparation is crucial. From cleaning and surface preparation to selecting the right materials and applying the paint, each step is vital. Let’s begin our journey in transforming those plastic parts into an expression of your unique personality, backed by professional insights and techniques. Ready to redefine your ride? Let’s dive in!
What You Need to Know Before Painting Plastic Parts
Understanding Plastic Part Properties
What if I told you that knowing the type of plastic can determine your painting success? During my engineering days, I learned the hard way that not all plastics are created equal. Understanding plastic part properties is a cornerstone in preparing for a painting task on your car. Identifying whether you’re dealing with ABS, PVC, or polypropylene can dramatically affect the outcome. For example, ABS plastics are notorious for their low adhesion properties, which can lead to peeling if not treated properly. By recognizing these characteristics, we can tailor our approach, enhancing both the durability and finish of your painted car parts.
Why Proper Preparation is Crucial
Cleaning the Plastic Parts
Did you know that neglecting to clean your plastic parts can lead to a finish that flakes off within weeks? I learned this the hard way when I once jumped right into painting without properly cleaning a set of plastic bumpers. The result? A disastrous finish that required redoing the work completely. Properly cleaning plastic car parts before painting is not just a step; it’s an essential foundation for ensuring your paint job lasts. Dirt, oils, and residues can prevent paint from adhering correctly, causing it to peel prematurely. To avoid this, I begin with a thorough wash using soap and water, followed by a wiping with isopropyl alcohol to remove stubborn residues. This meticulous cleansing forms the backbone of successful surface preparation for better paint adhesion. With a clean slate, I’m ready to transition into the next phase: optimizing surface friction and bonding. Proper cleaning truly makes or breaks the painting process, setting the stage for everything that follows.
Surface Preparation for Better Adhesion

What if I told you that scuffing the surface could double the lifespan of your paint job? It’s a simple yet transformative step in the preparation process. As someone who’s spent countless hours refining my skills, one crucial insight I gained from my colleagues is the power of scuff pads. By creating tiny micro-abrasions on the surface, these pads foster better plastic paint adhesion, preventing premature peeling or chipping. This meticulous step is not just about aesthetics but about achieving longevity. I’ve witnessed firsthand the stark contrast between rushed jobs and those where the surface was carefully prepared. By investing time in this phase, and priming plastic before paint, you’re setting a solid foundation that promises professional results with every project.
Selecting the Right Materials
Choosing the Best Paint
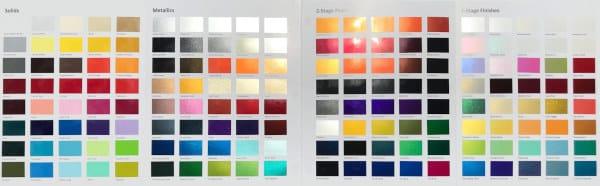
Did you know that not all paints can bond effectively with plastic? This critical insight emerged from my own trial-and-error process while painting plastic car parts. In my career, I’ve experimented with various paints. I once used a standard automotive paint on plastic and ended up with a peeling nightmare. That fiasco taught me the importance of selecting the best paint for plastic car parts. What makes these specialty paints so effective is their formulation, allowing them to adhere seamlessly to plastic surfaces. By making the right choice, you’re ensuring that your efforts yield a lasting and professional-quality finish.
Necessary Tools for the Job
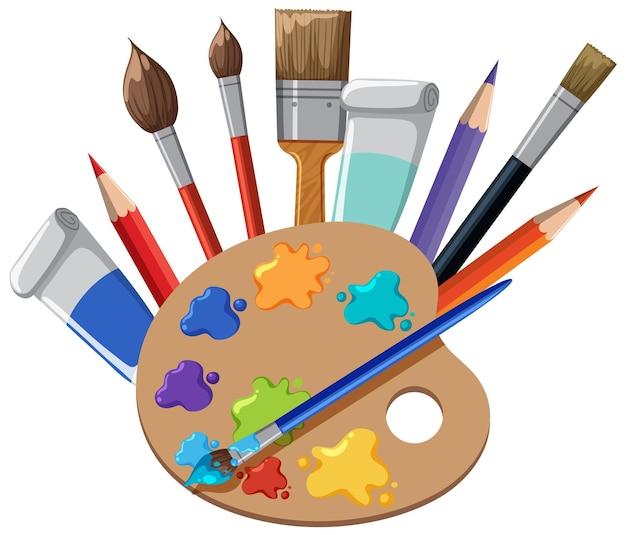
What if the right tools could cut your painting time in half? Let me tell you, selecting proper tools is not just a choice—it’s a necessity in the world of car paintwork. I remember a project where using subpar equipment turned a simple finish into a tedious ordeal. Trust me, nothing compares to the smooth precision of a quality spray gun when painting plastic car parts. Proper tools mean efficiency, saving you time and effort. Investing in quality isn’t optional; it transforms your work. Equip yourself with the right tools and witness the difference in your paint’s durability and finish quality.
How to Properly Paint the Plastic Parts
Techniques for Applying Paint
Did you know that the thickness of your paint can make or break your finish? This little-known fact can significantly impact the final look of your car’s plastic parts. When I first started painting, I often made the mistake of applying paint too thickly. Over time, I learned that painting techniques for plastic require a meticulous approach—laying down light, even coats rather than trying to cover the surface in one go. This technique not only ensures a smooth finish but also improves the paint’s adhesion.
Patience and precision are your best allies here. The key is to apply each coat and let it dry properly before proceeding, a step that’s easy to rush but vital for avoiding unsightly drips and uneven textures. Slow and steady truly wins the race. By leveraging these thoughtful techniques, you ensure that each layer bonds perfectly, setting the stage for the subsequent finishes and ultimately achieving that showroom look.
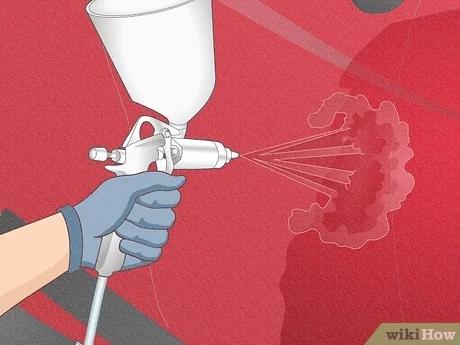
Using Spray Paint Effectively
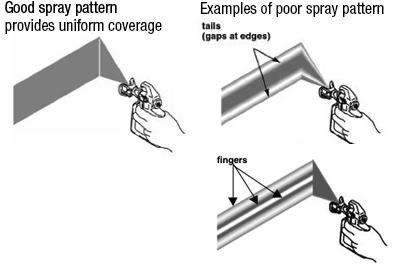
When it comes to using spray paint effectively on plastic car parts, experience is truly one’s best teacher. Ever wondered why experienced painters often keep a strict distance when spray painting? It’s crucial because maintaining the appropriate distance—usually around 12 to 18 inches—prevents overspray and ensures an even coat. I’ve had my share of mishaps, such as a particularly frustrating overspray incident when I rushed the application. That taught me the importance of not only distance but also patience.
The right technique can transform your project. For instance, moving the spray can in overlapping strokes while maintaining consistent speed avoids uneven layers and drips, yielding a smooth finish. Using the correct paint for plastic surfaces is equally vital; it’s specifically formulated to adhere properly, promoting durability. These best practices play a pivotal role in painting plastic car parts because they marry technique with material for optimal results.
Mastering the art of spray painting not only enhances the appearance but also extends the life of your car’s plastic parts. It’s a skill worth investing time in, as it saves countless hours in potential corrections and maintenance down the road.
Finishing Touches and Maintenance
Applying a Clear Coat
Did you know that a simple clear coat can extend the life of your paint job significantly? Let me tell you, applying a clear coat was a game-changer in my projects. When I first skipped this step, it led to premature fading, and I learned the hard way just how critical it is. A clear coat not only enhances the finish but provides essential protection against UV rays and scratches. This is a crucial part of the ‘Finishing Touches and Maintenance’ chapter, ensuring that your painted plastic parts look vibrant and last longer. By sealing the paint with a clear coat, I’ve seen it withstand the elements and maintain a pristine appearance, validating the importance of this step in my process. It’s this final layer of defense that truly preserves your car’s aesthetics, so don’t overlook it if you want your work to shine and endure. As I wrap up my thoughts on protecting your painted parts, I’ll share some maintenance tips to help you keep them looking fresh.
Maintenance Tips for Painted Parts
What if I told you that maintenance could double the life of your freshly painted parts? After investing all that time painting my car, seeing my effort tarnished by neglect was a hard lesson. From that experience, I learned the critical role of maintenance within the broader scope of Finishing Touches and Maintenance. Regular, gentle washes without harsh chemicals can preserve the luster of your paint job for years. My advice? Stay proactive. Over time, contaminants can dull painted surfaces, so frequent care is crucial. Your future self will thank you once you see your parts maintaining their vibrancy over time.
FAQs
What supplies do you need to paint plastic parts on a car?
How should you prepare the surface before painting?
What is the process of applying primer and paint?
How do you finish the painted plastic parts?
What precautions should you take when painting plastic car parts?
Conclusion
Ready to transform your car with a new paint job and impress everyone on the road? Reflecting on my journey as both an engineer and a writer, I’ve learned that preparation, technique, and materials lead to a successful paint job. Through this comprehensive guide, you’ve explored the intricacies of painting plastic car parts—an endeavor that combines knowledge with creativity.
Proper preparation is crucial, starting with a thorough understanding of the plastic’s properties. Cleaning and prepping the surface ensures better adhesion, while the right materials and tools set the foundation for a flawless finish. From selecting the best paint to mastering spray techniques, each step is a pivotal part of the process.
Applying a clear coat and adhering to maintenance tips guarantee lasting results, keeping your paintwork vibrant and robust. I hope you feel equipped to tackle this task with confidence, knowing that each brushstroke enhances not just the car, but your own satisfaction and pride in your work.